Thankful Tree: 2 Trees Every Kid Can Make This Thanksgiving
Around Thanksgiving time, my daughters and I usually create some fun, cute turkey crafts. This year, however, we wanted to try something different: making a thankful tree.
What is a thankful tree?
Thankful trees are typically part of Thanksgiving tradition and used to express gratitude. There are many ways to create a thankful tree. Some trees are created out of a branch with paper leaves hung on it. Other trees are less 3D and can be made out of paper or felt. For all thankful trees, each leaf has something that one is grateful for written on it and then attached to the tree as a seasonal display.
Some trees are interactive where guests and family members will all contribute leaves to the tree. In the case of the tree below, each thankful tree is personal to the creator, so all children, and even adults, would make their own tree. This is a great opportunity to discuss what it means to be grateful and thankful with your kids. My daughters (one is 6 and the other is 10) both had parents, family, and friends which are pretty common for thankful trees. There were also some very individualize items that were pretty cute like (her new) spiderman pajamas for the 6 year old and cheese cake and (new) bed for the older one. Since we live in NYC, everyone was also grateful for the car as not everyone here has one.

What is you family grateful for?
For this particular kids craft each tree is personal, so they can create them however they choose. I wanted minimal supplies and mess, so these could be created as part of Thanksgiving day or whenever. I also recognized that different ages (i.e. skills/creativity levels) would be creating them, so we have options for everyone. On the printable there is a fully colored in tree and leaves as well as a tree and leaves outline for those that want to color theirs in. The step-by-step below also walks you through more options, so read on before deciding which one to choose.
For More Thanksgiving Kids Crafts:
- Pipe Cleaner Turkey: A Colorful, Fun Kids Craft
- Colorful Feather Turkey Craft to Make With Your Kids
Thankful Tree Kids Craft
What You’ll Need:
- Thankful Tree Printable (link at the end)
- Printer (to print out the sheets)
- White Cardstock Paper
- Colored Cardstock Paper (if you are cutting out the leaves)
- Scissors
- Crayons, Colored Pencils or Markers (if you are coloring the leaves and/or tree in)
- Adhesive Dots
Creating Gratitude Leaves
1. There are a number of ways to create the gratitude leaves depending on what supplies you have access to and how creative your kids and you want to/can get. Since this crafty project can be done by many different ages (with a bit of help) here are 3 options and printable leaves for you. One page of leaves should be enough for one tree printout.
- OPTION 1: Colored Leaves Printout (page 2) – For those of you without colored paper and not wanting the extra step of coloring in the leaves, this is for you. Just print out the page with the leaves already colored in.
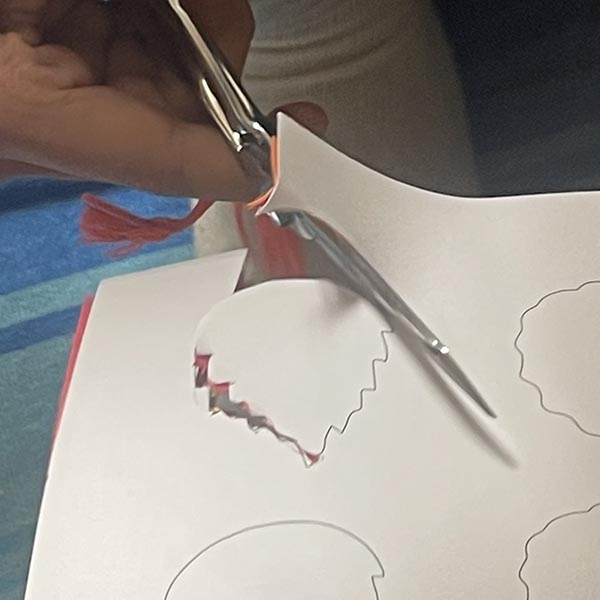
- OPTION 2: Coloring In Leaf Outlines (page 4) – For those of you looking to create some colorful, beautiful leaves by coloring them in OR have kiddos that love to color, this is for you. Print out the Leaf Outlines page. Color them in using crayons, colored pencils or markers. TIP: My youngest enjoys coloring, but not always staying in the lines. This project was perfect for her because the leaves will be cut out in the end. Color away! Don’t worry about the lines!

- OPTION 3: Colored Paper Leaves From Leaf Outlines (page 4) – For those of you with colored paper (or wanting to conserve your printer ink), you can create leaves by either cutting them out freestyle OR using the Leaf Outline Printout. TIP: My older daughter stacked the Leaf Outline page on top of several colors of paper and then cut out her favorite leaves. This greatly minimized the cutting time. Just make sure you hold the sheets tightly together, so they leaves look consistent.
2. If you used options 1 or 2, cut out your leaves and you are ready to move onto your tree.
Printing Out Thankful Tree
3. Once your leaves are cut out, it’s time to move to the actual Thankful Tree. (Technically, you can print your tree out whenever. We just printed them out second as both girls changed their minds after creating their leaves.). For the Thankful Tree there are 2 options you can print:
- OPTION 1: Thankful Tree And Message (page 1) – This one is full of color and ready for leaves
- OPTION 2: Thankful Tree And Message Outlines (page 3) – This page allows you or your kiddos to color in the tree and the message
4. Print out either tree, add color if needed, and you are ready to assemble.
Attaching Leaves To Tree
There are many ways that you can attach the gratitude leaves to your tree (I.e. glue stick, tape, glue, stapling), however, the cleanest, quickest, and no mess option I have found is to use adhesive dots. For those of you unfamiliar with them, they are thin jelly-like circles that stick wonderfully to paper. They don’t need drying time and are no mess. Here are some tips for using them with kids.
5. Peel the dot off the roll using the square liner and attach dot to the back of each leaf. TIP: If you have little kids, help them stick all of the dots on the leaves first. That way you can help them control how many dots they take off the roll at once (and put the roll away when done). My kids thought the roll was “too cool” the first time we used it.
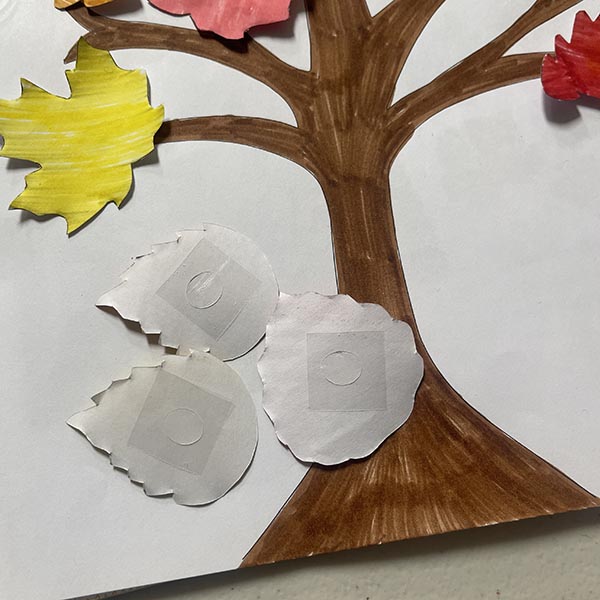
6. Peel the square liner from the dot and stick the leaf on the tree. It’s really that easy!
Writing On Gratitude Leaves
7. As this is a thankful tree KIDS CRAFT, I left the writing on the leaves until the last step. This is for several reasons:
- It allows the kids to stick the leaves on the tree however they want and not worry if the words are upside down.
- If you are helping a younger child write on the leaves (and your child lists off a lot of things they are grateful for very quickly, like mine), it makes it easier to write on the leaves quicker.
- It avoids losing leaves with gratitude on them MEANING its easier if you lose a blank leaf than one with Parents written on it. Trust me! You can re-cut them, but why go through the headache if you can just attach first.
8. Help your child write things that they are grateful for on the leaves or allow your older kids to do it themselves and display the tree where it can be seen. Enjoy!
DOWNLOAD THE THANKFUL TREE PRINTOUT HERE!

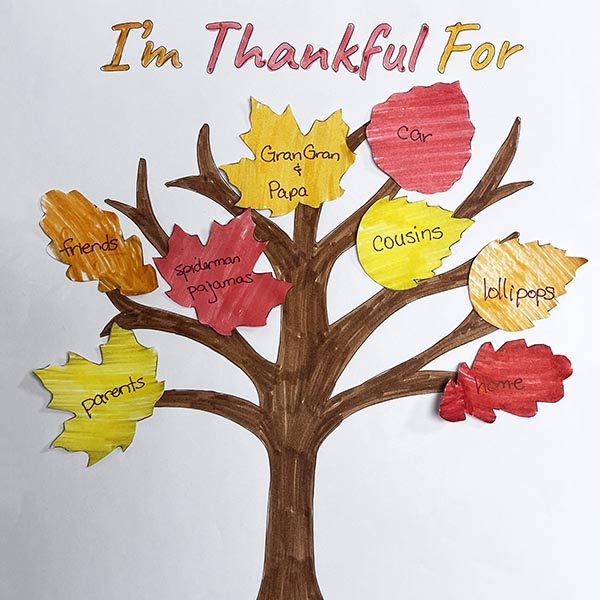
And here are some completed thankful tree crafts by the kids. Happy Thanksgiving everyone!! ~Nikole