An Easy Outdoor Halloween Sign With Pumpkin Base
Have you ever bought something, but not known exactly what you were going to do with it? Well, that’s the story of this cute and festive sign. I wanted an outdoor Halloween sign without the effort of making the sign from scratch and this was cute and a good price. Only issue was, we live in a house in the city where there’s no front yard (at least not at my house). No place to stick it in the ground. And so it sat…for a year! This Halloween I was determined to find a good base for it and that’s where the craft pumpkin came in. They are hollow which is great for filling and look just like the real ones, only without the mess. Once I filled it with sand it was as heavy, if not heavier than the real thing, so it became a super solid base. I added a cute sparkly bow as a finishing touch and TADA! A Halloween sign that can greet my guests and trick or treaters at the door!

ANOTHER FUN HALLOWEEN PROJECT: Spooky Silhouette Halloween Mason Jar Craft
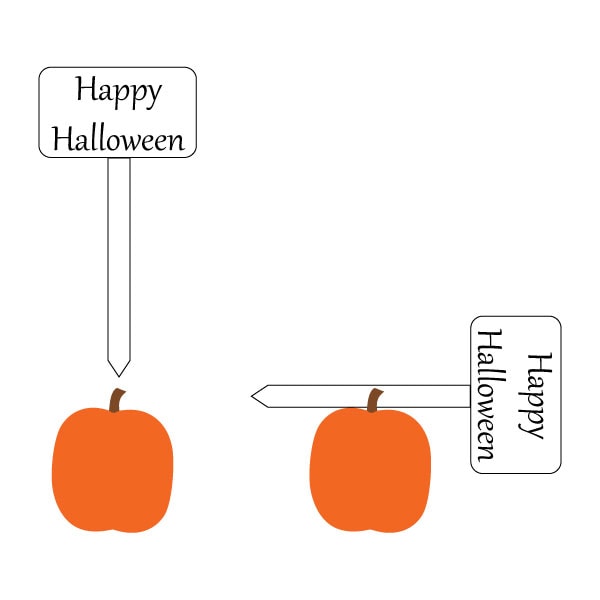
Outdoor Halloween Sign With Pumpkin Base
WHAT YOU’LL NEED:
- Halloween Sign with a yard stake (I bought mine here)
- Craft Pumpkin
- Sand (About 10-15lb depending on pumpkin size—-I got this inexpensive play sand)
- Box Cutter/X-acto Knife/Serated Knife
- Wired Ribbon for bow (Optional)(What I used)
- Floral Wire for bow (Optional)
- Needle Nose Pliers for bow (Optional)(I use my Leatherman)
- Clear Matte Spray (I love this one…and use it on a number of crafting projects!)

Material Tips:
- The Pumpkin—Unless your sign is very small, buy a large craft pumpkin. Bigger is better in this case because it will serve as the weighted base to hold the sign in one place, especially in the wind. It also makes it more manageable to cut and fill with sand. Ours is 13″ height. Also, in full disclosure, the craft pumpkin I purchased does say that it is for indoor use only. That being said, I added a clear sealer to the outside of the pumpkin as well as the sign to help them handle the weather better. So far, it is holding up perfectly well, even in a bit of rain (If it is going to rain all night long I sometimes bring it inside).
- Cutting the Hole—For this project, there are many cutting tools that will do the job (which is why I listed several). We used a box cutter to score and cut through the foam as that was just the closest tool handy at the time.
- Sand—Even though the sand in your kids’ sandbox may seem like an easily accessible supply, don’t use it! Trust me, I tried! Even though you won’t be using a crazy amount, it still has bugs, debris, and other unappealing things in it. Makes it most unpleasant to pour/fill and not super cool to have in your pumpkin and potentially house (should you decide to bring it inside for storage).
- The Bow—I’m a fan of bows and any excuse to use pretty ribbon, so a bow was a nice way of covering up the hole in the pumpkin (Here’s a step by step how to for creating a similar bow with your ribbon). Honestly though, if bows are not your thing or not in the budget, that’s fine too. The sign post fits snugly in the hole in the pumpkin, so it doesn’t look like an eye sore.
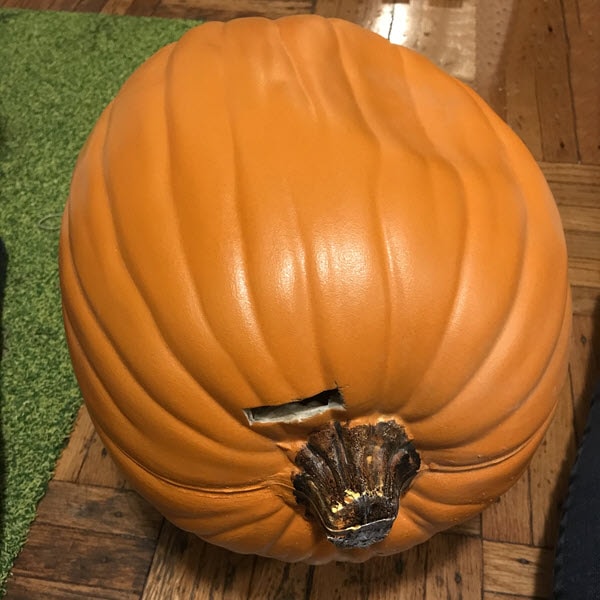
CUTTING THE HOLE
To make the hole in the pumpkin for the sign stake, we need to draw cutting lines with a pencil.
1. Hold the sign above the pumpkin as if it was going into it and then turn it 90 degrees and lay the stake down on the pumpkin.
2. Draw a line on each side of the stake on the pumpkin.
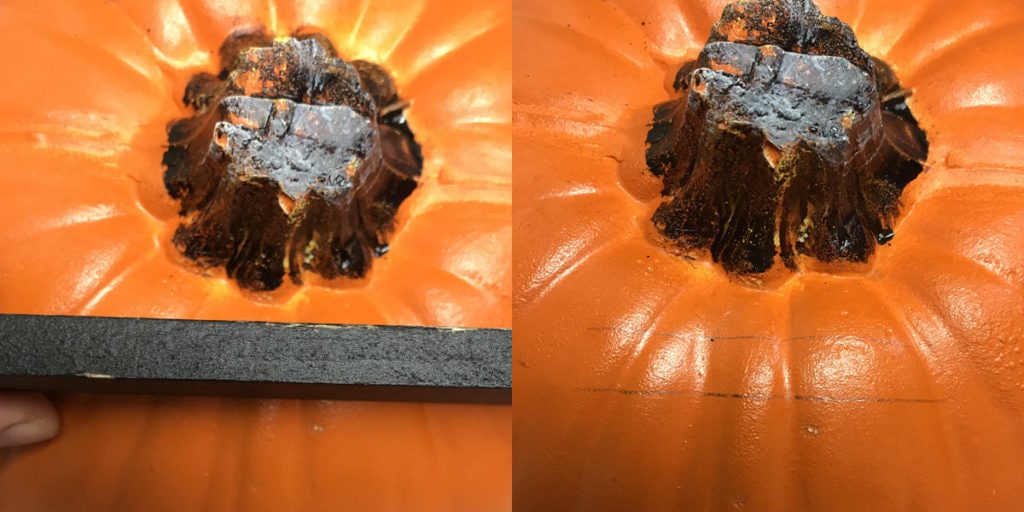
3. Now take a ruler and measure how wide the stake is. Figure out where you would like the stake to start on the pumpkin and using the ruler make a straight line. Measure the width and make another line. Now you know where you’ll need to cut.
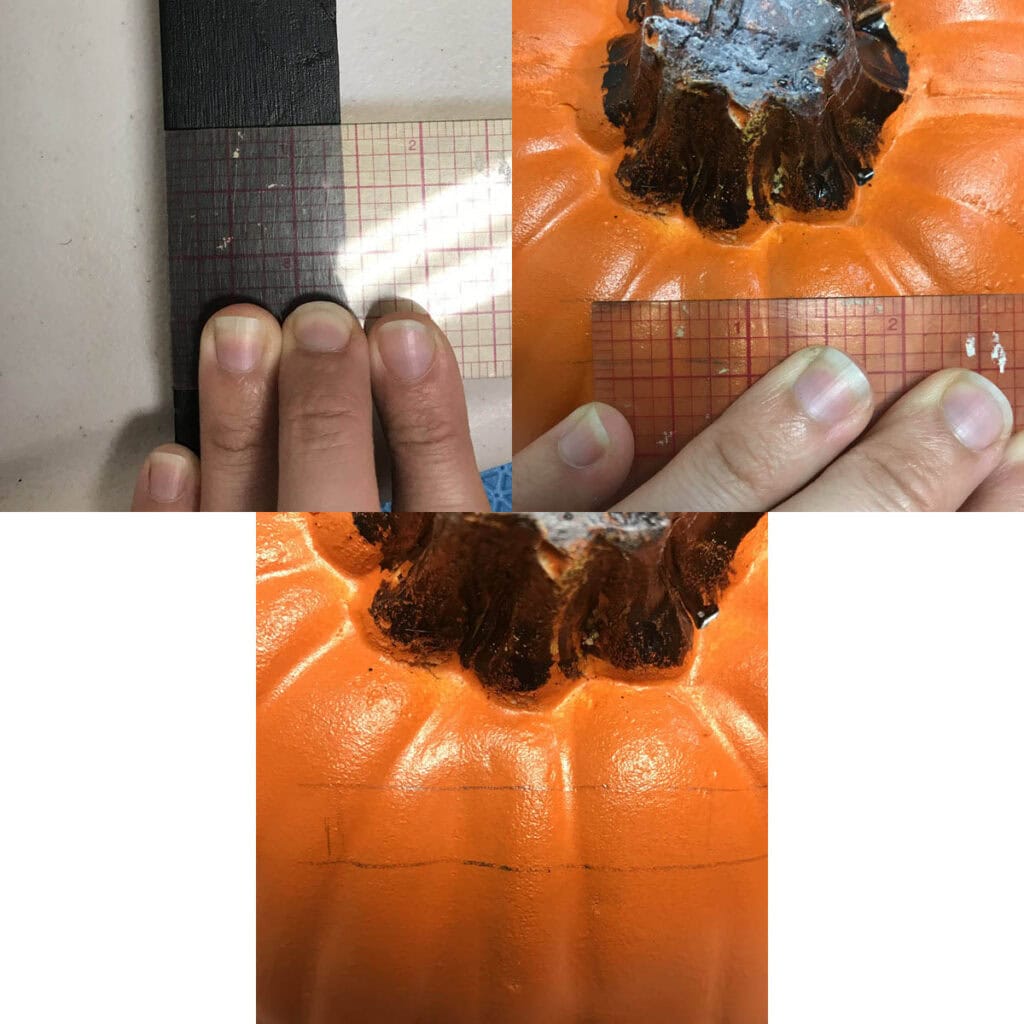
4. Using your cutting tool, carefully score the foam, making the line a bit deeper with each pass until you get all of the way through. Once the hole is completely cut, put the stake in to make sure it fits. If it’s really snug that’s fine. Pull the stake out and set it aside.

THE SAND
5. Now onto the fun part…the sand (and yes I’m being a bit sarcastic). Most likely whatever bag you buy (we bought play sand) will have some moisture in it. You can try to pour it in as is, but it doesn’t pour very smoothly and will take a long time to fill. I got very frustrated trying to use it damp. Dry sand however is VERY easy to pour (and much less annoying), so I would strongly recommend drying out your sand. To do that, you have a few options:
A. You can pour it into a large bucket like the pink one below (our laundry/water balloon/catch all bucket) and leave it overnight in a dry place.
B. You can also leave the bucket next to a dehumidifier if you have one.
C. We chose a quicker route which involves the oven. I must admit that when my husband suggested it I was a bit skeptical (ok, quite a bit). I thought, how am I going to tell you to use the oven…you’ll think I’m crazy! Well, it worked like a charm! My husband and older daughter actually did the experiment while I was out (hence the 3 containers) and came up with the perfect “recipe” for getting moisture out of sand quickly. Gotta love them!! For the quickest results, use a shallow baking pan or pans, depending on the amount of sand. We used our 13”x9” Pyrex baking pan. Turn the oven to 400 degrees and once it’s preheated, pop the pans in. It will take about 30min and you will need to stir once or twice. If steam comes out, put it back in the oven. If no steam comes out when stirring it, it’s ready. WARNING: Sand holds heat well, so just because the surface feels cool, it may be VERY hot underneath! Be sure to either stir it up a few times while it’s cooling to let the heat escape OR leave to sitting out to cool for a while. Since it is fall and cooler, perhaps leaving it outside can help in the process (like it does for my baked goods).
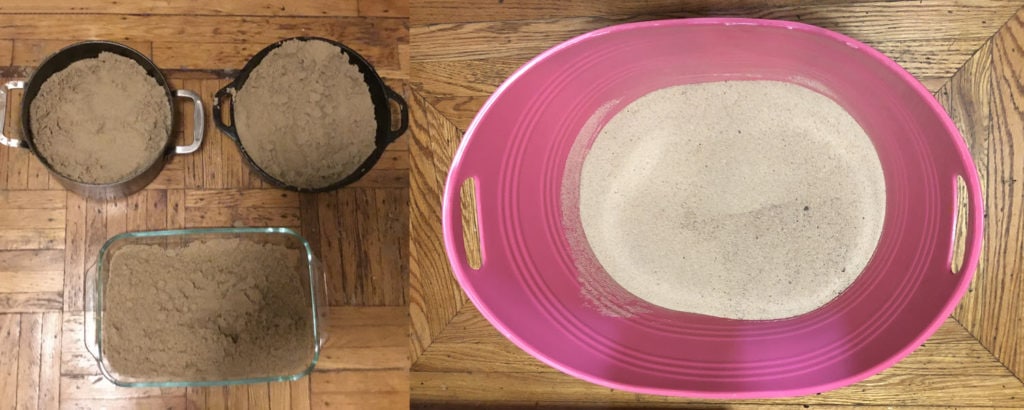
One Last Note: You can tell from the pics below that wet/damp sand (left pic) looks different from dry sand (right pic). You’re aiming for the sand on the right, however you choose to get there.
FILLING THE PUMPKIN
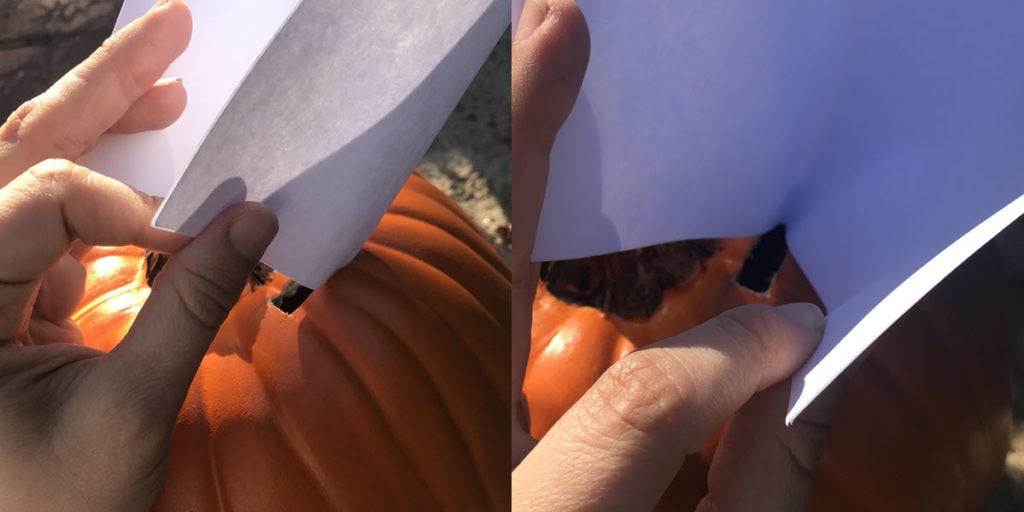
6. Once the sand is dry, you’ll need a funnel to help fill the pumpkin. The easiest and cheapest option is a sheet of paper. Yes, seriously! Bend the paper in half (no crease needed) and insert the bended part into the opening of the pumpkin. Gently pour the sand in while holding the paper. And how much you ask?? This is really a personal preference. The goal of the sand is to give the pumpkin enough weight to keep the sign upright while also stabilizing the stake, so the hole doesn’t have to take all of the stress. I poured a bunch of sand in and then picked up the pumpkin. I kept doing that until I felt that the pumpkin was pretty darn heavy (17lb in the end—-I weighed it).
7. When you have enough sand in the pumpkin, lay it on it’s side with the opening at the top, like in the pic. This will shift the sand, so you have space to slide the stake back in without pushing through too much sand.
8. Slide the stake in. Make sure it’s FACING THE RIGHT WAY (which is front side down so the hole is in the back).
9. Stand the pumpkin up right and give it a little shake so the sand resettles around the stake.
FINISHING TOUCHES
10. OPTIONAL: Add a festive bow to your Halloween sign or perhaps some fake foliage to the pumpkin base. Here’s a step by step of how to make that sparkly bow.
11. If this is going outside, you may want to apply a clear matte spray for extra protection. I love this one and use it on a variety of projects.
This project also works well with outdoor fall signs as the pumpkins can be more harvest than Halloween.
