Create A Beautiful Beach Shells Serving Tray
Ever since I moved to NYC and met my, then boyfriend, now husband, we’ve been going to the beach. It’s one of those summertime weekend events that we almost never miss, even now with our daughter. And throughout the years and many, many trips I have picked up tons upon tons of shells. I’m in love with the colors and the shapes (not to mention that subtle sea salt beachy smell)! I’ve been looking for a project to use some of them in that wasn’t cheesy and highlighted the shells. Project found! This beach shells serving tray is beautiful, but also functional. If you have a collection of beach shells, you’ll want to check this out.
Much of this project’s success is determined by the prep and planning up front prior to actually making it. I’ll walk you through step-by-step, with all of the tips I learned along the way and anything I might do differently next time. It is a bit of a lengthy read, so grab some coffee or iced tea (or pin it for later).

Beach Shells Serving Tray
WHAT YOU’LL NEED:
- Beach Shells
- Serving Tray (Similar to mine)
- Paint (for appropriate type of tray material)
- Casting Resin
- Craft Glue
- 150 or 220 Grit Sandpaper (if you are using a galvanized metal tray)

Type Of Shells To Use
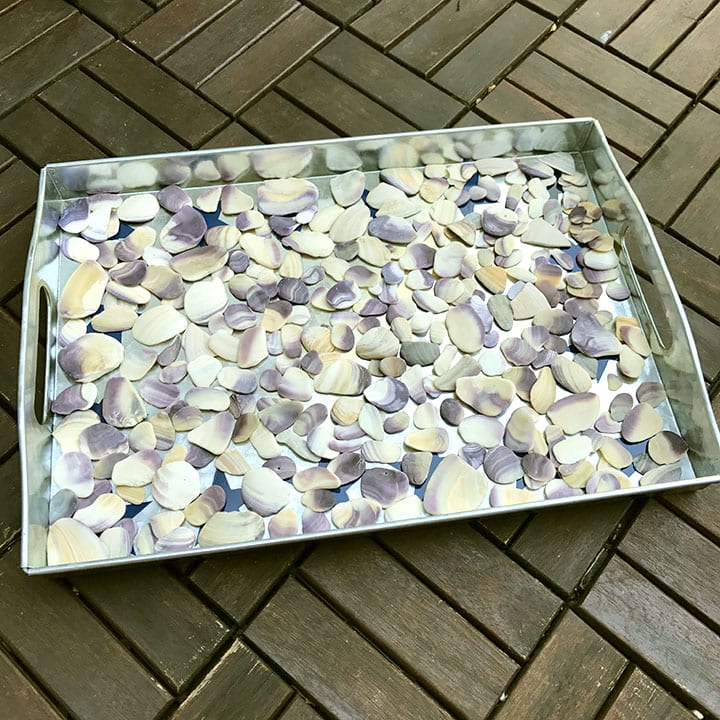
For this project you will want shells that are relatively flat, so they can be covered by the resin. This will insure you have a flat surface for a beautiful, but also functional serving tray. I chose pieces of Quahog clam shells that I found on the Long Island beaches. They are fairly flat and have these beautiful purple and yellow colors.
Full Disclosure: I had a few pieces that were a bit thicker than the rest and could not be fully covered by resin. Since I didn’t want to part with them (and they only stuck up a little bit), I put them around the edges of the tray. If that will bother you (as it would for my husband), then make sure to pull them out before you figure out what tray size to go with. That way you’ll know what you’re left to work with.
Choosing A Serving Tray
There are a few things to keep in mind when choosing a serving tray for this project.
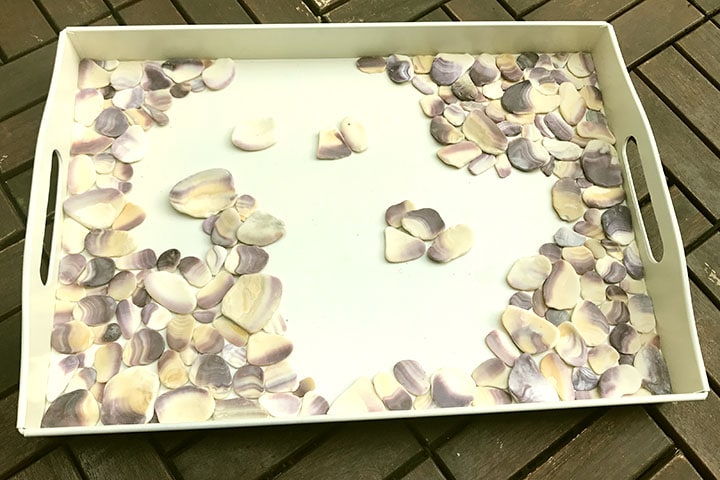
- Size Of Tray – The size of the tray will depend on how many shells you have to cover the bottom as well as what options are available at the store. Buy a few options if unsure and return whatever didn’t work (or in my case, keep them for future projects. Oops!). TIP: You should lay the shells in the bottom of the tray as a test to see if they fully cover it before committing to a tray. Definitely opt for more (or extra shells) rather than just covering. In the pic below, you can see that it looks like I covered everything. I did end up pulling a few shells out from the bunch after the pic, but this was actually not quite enough to cover (and I found out after most of the shells were laid down—yipes!). I was super lucky, however, to find another bag of shells. Otherwise, it would have been a trip back to the beach before finishing the project…thankfully, it is summer.
- Depth Of Tray/Cutout Handles – If your tray has cutout handles, like mine, it will really limit the depth of the resin you’re pouring and the thickness of the shells you can use. If you have thicker shells or don’t want to worry about resin potentially spilling out the sides, buy a tray with handles attached to the outside or top.
- Type of Material For Tray – Most of the trays I’ve seen are made out of either wood, metal, plastic, or glass. You will want a tray that is sturdy enough to hold the weight of the shells and resin while not being too heavy itself. I would suggest either wood or metal. In my case I chose metal, a galvanized metal, which comes with some additional prep work, see below.
Tray Prep For Galvanized Steel
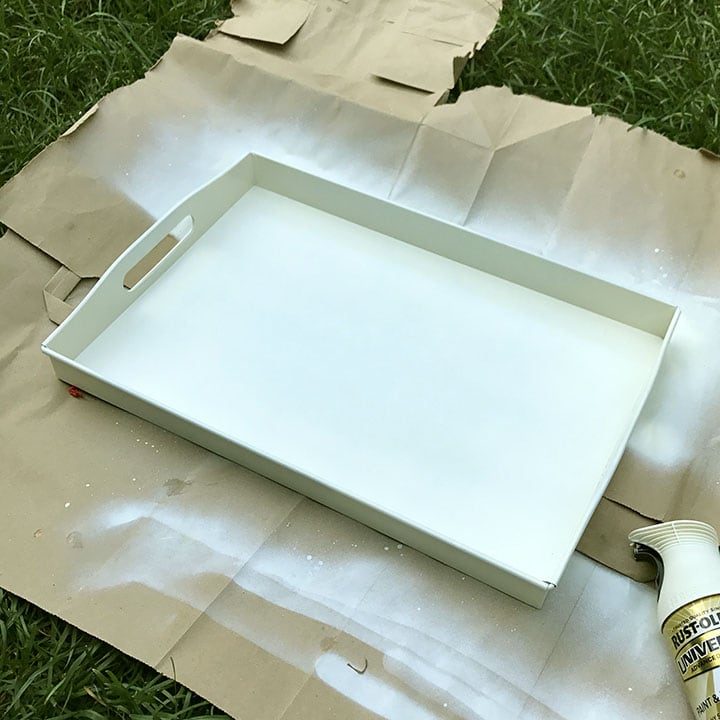
If your tray is not made of galvanized steel, than most paints will work fine without additional prep work (so you can skip this section). If you picked a galvanized steel tray, like I did, you will need some additional steps, so the paint will stick. Most paints will actually say that they should not be used on galvanized steel, like the spray paint I used. With a little prep work and some testing though, I found that a metal paint could still work.
First, wash the tray with soap and warm water to remove the oily film from the surface. Next, sand the entire surface with the sandpaper, both inside the tray and out. Make sure to get all sides and edges, too. This will rough up the finish that is under the oily film and allow the paint to stick. Finally, take a damp cloth and wipe down the tray to get the dust from sanding off.
1. Once your tray is prepped, if needed, you are ready to paint the tray. Lay some paper down first to protect whatever you are painting on (grocery bags work great!). Paint the bottom of the tray first according to the paint instructions. The bottom is a great test to see how the paint dries and sticks to the tray. Once the bottom is completely dry, turn it over and paint the top/inside.
2. While the tray dries, wash the shells in a bit of warm soapy water to get any dirt and sand off. Let them dry.
3. Once the tray and shells are both dry, lay out and glue the shells to the tray with craft glue. I prefer to glue the shells down prior to pouring, so they stay where you want them to when pouring the resin. It also helps if you need to move the tray mid-layout.
LAYOUT TIPS:
- If you have varying sizes of shells, like I did, glue down the larger pieces first, spreading them around the tray evenly. You can then fill in the rest of the space with the smaller shells, see pic below.
- Work in from the corners and continue to rotate the tray after placing 10-15 shells. This allows the glue time to dry between sections, so shells don’t slide. It also helps keep the shell placement random and not fall into subconsciously creating a pattern. (Unless you are creating a particular pattern with the shells…then ignore what I just said)
4. When all of the beach shells have been glued down, allow time to completely dry.
5. Now you’re almost ready for pouring the resin in the tray. Important Prep Step—Pouring Location. Wherever you will be pouring the resin, it needs to be:
- Well Ventilated
- Level Surface: YES, get out a level or borrow one and make sure the table or at least the tray is level. Put cardboard (or anything else that adds height) under any of the low corners to bring it up to level. After all of this work, it would be a tragedy to have a slanted surface.
- Someplace that the tray can sit for at least the minimal cure time (usually 18-24 hours). Make sure it’s away from anywhere people or pets will be walking. I unfortunately put the table in the middle of our back room where everyone walks to get to the kitchen and backyard. Thankfully, I have an awesome husband and daughter who were super cautious, but good to avoid for next time.
6. Finally, it’s time to pour the resin! Hallelujah!! Follow the instructions on how to mix and pour the solution.
POURING TIPS:
- I found it helpful to drizzle the resin in a zigzag pattern across the tray to fill in the gaps between the shells.
- Let the resin run to the edges from those zigzag patterns rather than pour by the edges and risk touch the side of the tray. It’ll never come off.
- You may need 2 coats (or 2 boxes of resin in my case) to fully cover all of the shells. I only bought one box to begin with, so I needed to run back to the store to get another. It worked out fine because usually there is a minimal wait time between coats. I poured the second coat 8 hours later and you cannot tell that there were 2 separate coats.
- Bubbles – The resin I bought actually has very minimal bubbles when pouring, which was a concern of mine in the beginning. For the few bubbles that remained after pouring, I was able to pop them with the stirring stick rather spray some alcohol on it as the instructions said. Very easy. I also left a few bubbles as it reminds me of water.
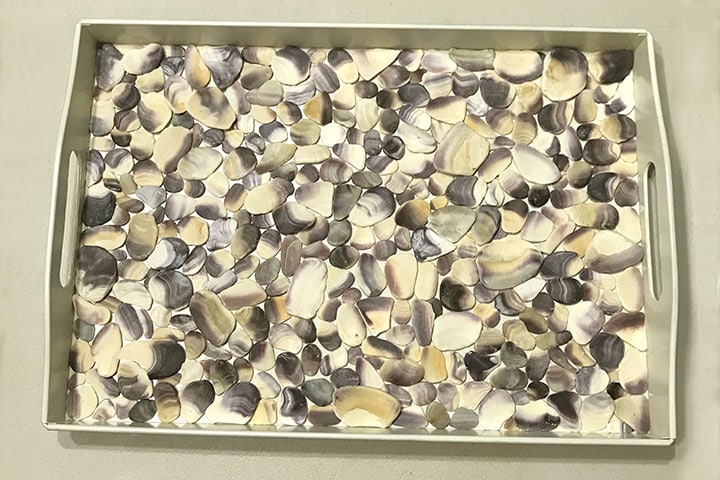
7. Let the resin cure fully prior to using the tray.

Well, this was definitely a longer post than originally intended, but it captures all of my ups and downs with project. This would also work great with glass, pieces of china, or anything else that has a bit of thickness to it.
What do you do with the shells you collect from the beach? Let me know in the comments.